
How to Set Up Nintendo Switch 2 Parental Controls: App, Play Time, GameChat and Spending
A step-by-step guide to Nintendo Switch 2 parental controls: linking the free app, choosing an age level, setting play time limits and Suspend Software, approving GameChat friends and video chats, and turning on eShop spending restrictions in your Nintendo Account family group.
Disclosure: This page may contain affiliate links. They do not influence our editorial conclusions. Read the disclosure.
Our pick
- See price at Nintendo
Top pick
Nintendo
Nintendo is the Japanese video game company behind the Nintendo Switch 2 and Nintendo Switch consoles, Nintendo Switch Online and franchises such as Super Mario...
Steps in this guide
Handing a Nintendo Switch 2 to a child is easier when the rules are set before the box is opened. Nintendo gives parents three separate tools for this: the free Nintendo Switch Parental Controls smartphone app, a basic set of controls on the console itself, and spending and eShop restrictions that live in your Nintendo Account family group online. They overlap, and the setup screens on Switch 2 use slightly different wording than on the original Switch, which is where most families get stuck.
This guide walks through the whole setup in order, using Nintendo's own parental controls page and support articles as they read on November 13, 2026. It is a research-based walkthrough, not a hands-on review, and every menu name below is quoted from Nintendo's instructions.

What you need before you start
Nintendo lists a few requirements on its support page for linking a Switch 2 to the app:
- A parent or guardian Nintendo Account. The account that signs in to the app must belong to someone aged 18 or older. The same account can sign in to the app on several phones or tablets.
- An iOS or Android device for the Nintendo Switch Parental Controls app. The app is free.
- An internet connection on both the console and the phone while you link them.
- A Nintendo Account for your child if you also want spending limits or GameChat rules. Accounts created for children who fall under parental consent laws are automatically set as "supervised" inside your family group.
If you have not yet secured your own account, our guide on setting a Nintendo Account password or passkey is worth doing first, because Nintendo is ending Google and Apple sign-in for Nintendo Accounts in January 2027 (details in our news post).
Step 1: Link the Switch 2 to the Parental Controls app
Nintendo's support article "How to Link or Unlink Nintendo Switch 2 and the Nintendo Switch Parental Controls App" lays out these steps:
- Download the Nintendo Switch Parental Controls app. Nintendo says visiting p.nintendo.com on your phone redirects to the App Store or Google Play. You can also scan the QR code that the Switch 2 shows during setup.
- Open the app and tap Start, read the overview, and choose whether to send usage data.
- Tap Sign In / Create Account, sign in to your Nintendo Account in the browser, and confirm the account nickname.
- Back in the app, tap Next. A six-digit Link Code appears on your phone.
- On the Switch 2, open System Settings from the HOME Menu and scroll down to Parental Controls.
- Select Set Up Parental Controls, then App Has Been Installed. If you already set controls on the console without the app, Nintendo says to select Change Settings, enter your PIN, and choose the option to set up in the app.
- Enter the six-digit code and select OK.
- Select Link, then OK on both the console and the phone.
Once the link is complete, everything else is managed from the app. Nintendo's UK support page notes that one app can be linked to up to eight Nintendo Switch 2 or Nintendo Switch consoles, which helps if siblings have their own systems.
If you are upgrading from an original Switch that already had parental controls, Nintendo says System Transfer can carry your Parental Controls and other settings over to the Switch 2 as they are, so you do not need to redo them.
Step 2: Choose an age level for games
The first decision in the app is which games can be played. Nintendo offers pre-set age categories for quick setup, or custom settings based on your child's age, and games are filtered by their ESRB rating in the US. A parent can override the restriction with the PIN.

Two details from Nintendo's page are easy to miss:
- Allow-listing specific games. You can exempt individual games from the Restricted Software setting. That is useful when a game is rated above the age you chose but you are comfortable with it.
- Download notifications. The app can send push notifications when new games are downloaded to the console.
The same screen holds the communication settings. Nintendo's "In-Game Communication with Others" control can limit messaging and the sharing and viewing of user-generated content, either for all games or game by game. There is also a setting to restrict posting screenshots to social networks, but Nintendo notes it does not apply to Switch 2, because Switch 2 cannot post directly to social media. The VR mode restriction, which Nintendo recommends for children six and under, is also irrelevant on Switch 2, since the Labo VR Kit is not compatible with it.
Step 3: Set play time limits
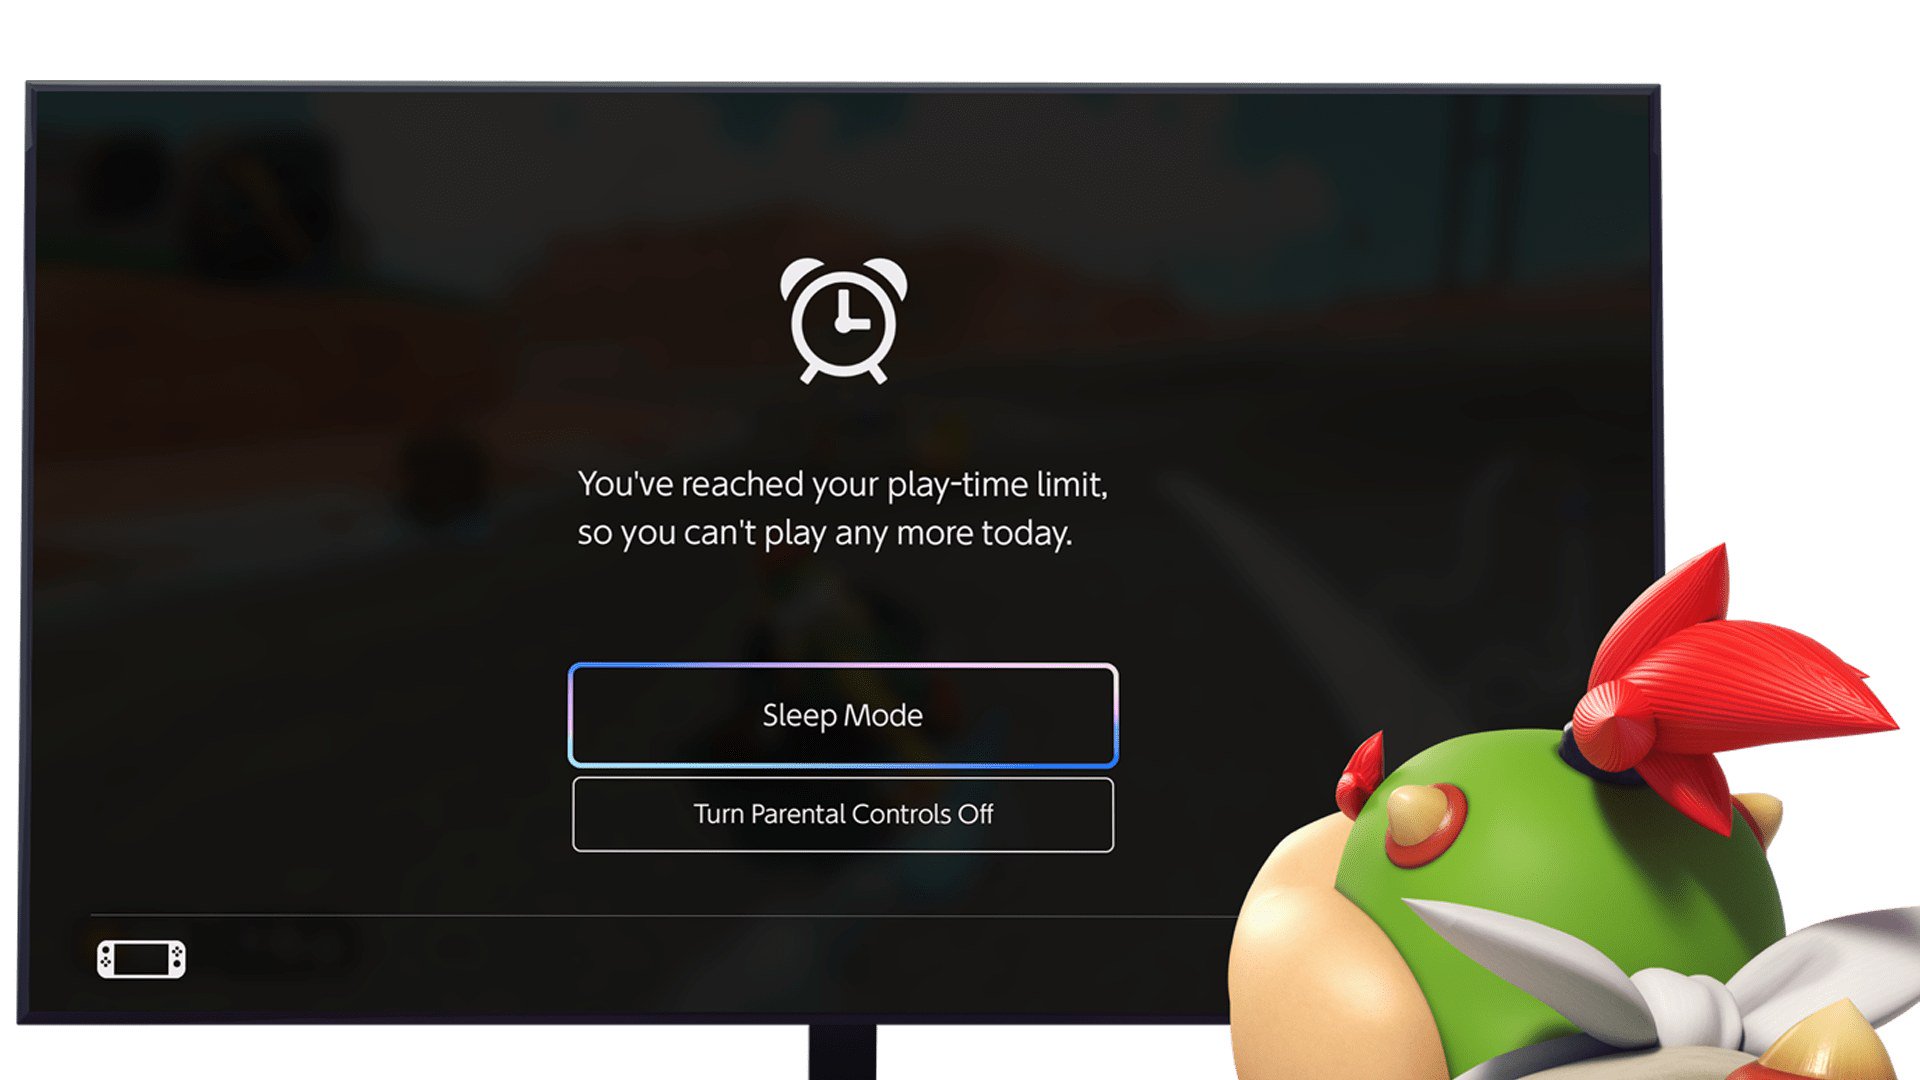
Play time is the feature most families use daily. According to Nintendo, you can set how long, or how late, the console can be used each day. When time runs out, an alarm appears on screen. You can go further and choose Suspend Software, which interrupts the game automatically when time is up.

A few practical points from Nintendo's description:
- The app tells you if the system stays on past the limit, even when you only use the alarm.
- Using the PIN, a parent can add more time, or turn off the alarm and suspension temporarily or for the rest of the day.
- Limits can differ by day of the week, as the app screen above shows, so school nights and weekends can have separate rules.
- With Shared Parental Controls, two parents or guardians can each check activity and change play time limits from their own phones.
If you choose the alarm only, children can keep playing after it appears, and you will just see the overrun in the app. Suspend Software is the stricter option. Because it interrupts the game, it helps to remind kids to save before the limit.
Step 4: Decide how GameChat works for your child
GameChat is the Switch 2's built-in voice and video chat, and it has the most specific rules for younger players. Per Nintendo's parental controls page:
- A parent or guardian must be involved in setting up GameChat for players under 16 and for any supervised account, and must manage it through the Parental Controls app.
- Players under 16 can only GameChat with friends a parent has approved. The app lets you add a note about who each friend is, such as a school or team friend.
- Video chat needs a compatible USB-C camera. Each time a player under 16 starts a video chat, a request goes to the parent's app, and the chat only proceeds if you approve it.
- You can review GameChat history, including who your child chatted with, for how long, and the camera's field-of-view setting.

GameChat also needs a Nintendo Switch Online membership and a Nintendo Account. If you are weighing whether the subscription is worth it for your family, our Nintendo Switch Online review covers the plans and prices.
Step 5: Turn on spending and eShop restrictions
Spending is not controlled in the app. Nintendo handles it through your Nintendo Account family group on the web, and nothing is restricted by default. Nintendo's support article on eShop restrictions gives these steps:
- Sign in to the parent or guardian Nintendo Account at the Nintendo Account website.
- Open Family group and select your child's supervised account.
- Under the parent or guardian restrictions, check Spending Restrictions to disable purchases and auto-renewal on Nintendo Switch 2, Nintendo Switch, and the Nintendo Store, including physical orders.
- Optionally check Age-Based Content Restrictions, which limits what your child sees in the eShop based on their age.
- Click Save changes.
If your child's account was created as a general account, you first need to set it as supervised. Nintendo's steps: open Family group, select the account, choose Set as supervised account, and the account owner confirms through a verification email.
Nintendo's Switch 2 support pages also list what spending restrictions do not stop several things: adding funds with a Nintendo eShop card or code, downloading free software and demos, redeeming a download code for a game, and redeeming a Nintendo Switch Online membership code. Nintendo's suggestion for a budget is to add a set amount of funds to the child's account, so they can only spend what is in the balance.
For the store side of buying games and hardware, see our Nintendo Store shopping guide.
Step 6: Check activity and adjust
After a week, open the app's activity view. Nintendo says it shows how long each game was played each day, plus a monthly summary of most-played games for each person.

Nintendo's page suggests that knowing which games your child plays most can make it easier to talk about them. In practice, the monthly view is also a good moment to revisit the age level and time limits as your child gets older.
How to unlink or remove parental controls
If you sell or hand down the console, unlink it. Nintendo's steps from the app: tap the menu icon, find the console, tap the three dots next to it, then Unlink and Continue. From the console: System Settings, Parental Controls, Unlink App, enter the PIN, and select Unlink.
Nintendo notes two consequences. Restrictions set through the app are removed from the console when you unlink, so you would need to set them again. And unlinking does not change eShop restrictions set in your Nintendo Account.
Quick checklist
| Task | Where it is set | Default |
|---|---|---|
| Game age level and allow-list | Parental Controls app | Off until set |
| Daily play time and Suspend Software | Parental Controls app | Off until set |
| GameChat friend approval and video requests | Parental Controls app | Required for under-16 and supervised accounts |
| Spending and auto-renewal | Nintendo Account family group | Not restricted |
| eShop age-based content | Nintendo Account family group | Not restricted |
| Basic controls without a phone | Console System Settings | Off until set |
If your Switch 2 is a holiday gift, doing steps 1 to 5 before wrapping saves a lot of negotiating on the day. Our Switch 2 FAQ explains game-key cards and storage, and our Switch 2 vs Switch OLED comparison can help if you are still choosing a console.
References
- Nintendo Switch Parental Controls app page (Nintendo US)
- How to Link or Unlink Nintendo Switch 2 and the Nintendo Switch Parental Controls App (Nintendo Support)
- How to Link a Nintendo Switch Console to the Nintendo Switch Parental Controls App (Nintendo UK Support)
- How to Set Nintendo eShop Restrictions (Nintendo Support)
- Can I Set a Nintendo eShop Spending Limit for My Child? (Nintendo Support)
- Restricting Purchases, Nintendo Switch 2 Support (Nintendo)
- What Are the Different Roles in a Nintendo Account Family Group? (Nintendo Support)
Meet your guide
Lipeiguan
author
What to read next
 Best Papablic Portable Bottle Warmers and Breast Milk Coolers (2026) A research-based 2026 comparison of official Papablic NutriWarm, CapsuleChill, and On-the-Go Feeding Kit specs, November 19, 2026 listed prices, modes, capacity, and U.S. shipping...
 How to Choose Gap Factory Coats and Jackets for Kids and Babies A research-based guide to official Gap Factory kids, toddler, and baby coats, comparing November 19, 2026 listed prices and product-page details for puffer parkas, a rain jacket, a...
 Once Upon a Farm Review: Organic Pouches, Ratings, Certifications and the Tractor Wheels Recall A research-based review of Once Upon a Farm's refrigerated organic pouches and meals, including Clean Label Project certifications, official 4.9-star Baby Starter Box ratings, and...